 Mezzanine CMS (content management system) is an open source, powerful and easy-to-use solution for content management and blogging. It is built on top of Django - Python-powered web-development framework - under the BSD license. The default functionality of the Mezzanine CMS allows covering the majority of common needs. At the same time, due to a vast number of third-party extensions, widgets, modules, and themes, the platform can be easily customized to suit customers specific needs.
Mezzanine CMS provide benefits for both developers and content managers:
- WYSIWYG editor with the Drag-and-Drop page ordering and visual content editing
- scheduled publishing
- a broad variety of ready-to-use themes
- rich API
- out-of-the-box Django internationalization, Twitter Bootstrap, Disqus, Akismet spam filter, Twitter feed, and Google Analytics support
- embedded integration with social networks, search engines, SEO functionality, and a huge number of modules
So, today we’ll consider how to host such CMS at Jelastic PaaS.
Create Python Environment
To host Mezzanine CMS, you need a Python-based application server. Let’s create a new environment with the Apache Python node:
1. Click the New Environment button at the top of the dashboard to access topology wizard.![]()
2. Open the Python tab, where the required Apache Python application server will be selected by default.
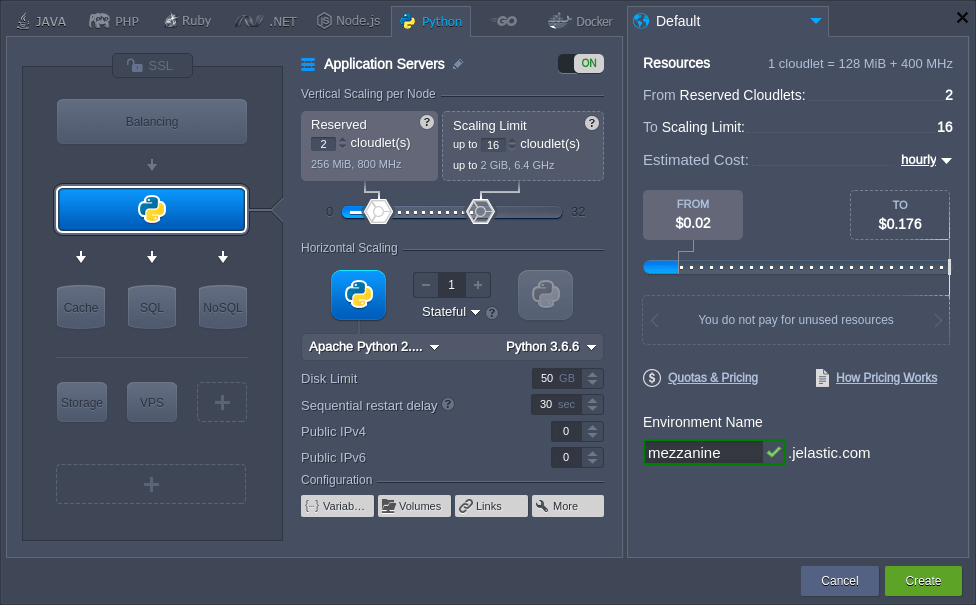
If needed, configure other settings (e.g. cloudlet limit, public IPs, region, etc), type environment name and click Create.
3. Your environment will appear at the dashboard in a moment.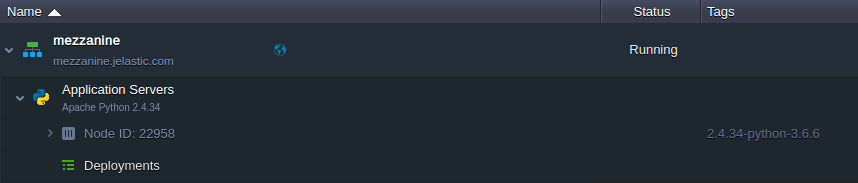
Now, you can proceed to the Mezzanine CMS application deployment (either automatically from the pre-packaged archive or manually).
Mezzanine CMS Automatic Deployment
You can automatically deploy Mezzanine CMS using a specially prepared deployment archive with the latest application version (i.e. 4.3.1) already configured with SQLite database.
- requirements.txt file with the names of all the Python modules your application requires, it will be read by the deployment script to install the listed modules via the pip manager automatically
- wsgi.py file with the entry point script for running your application inside a virtual environment by means of the mod_wsgi for Apache
1. Add application archive to the deployment manager via the following link:
https://download.jelastic.com/public.php?service=files&t=3d6fa1ed641a044c6a291bbeaa6c333c&download
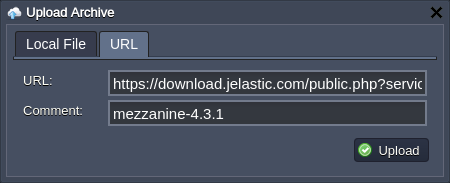
2. Deploy Mezzanine CMS into the environment with the Apache Python application server.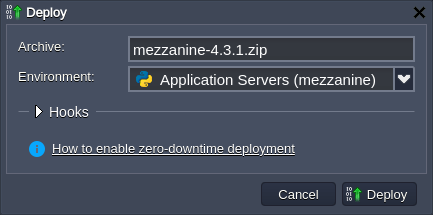
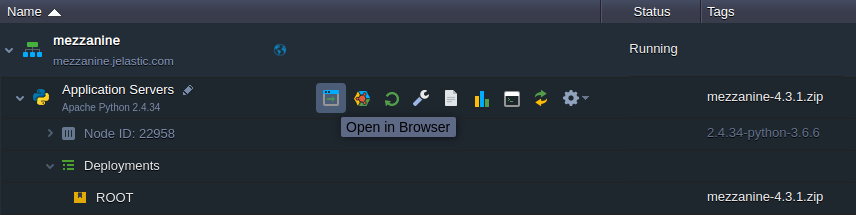
3. After successful deployment, click Open in Browser next to your environment.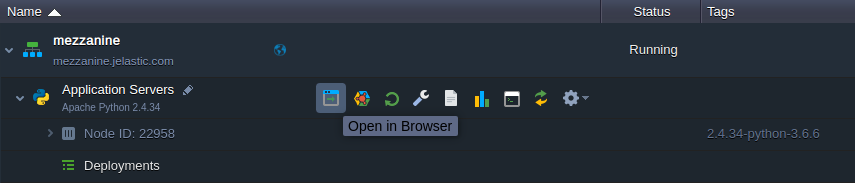 4. That’s all, your Mezzanine CMS is up and running in just a few minutes!
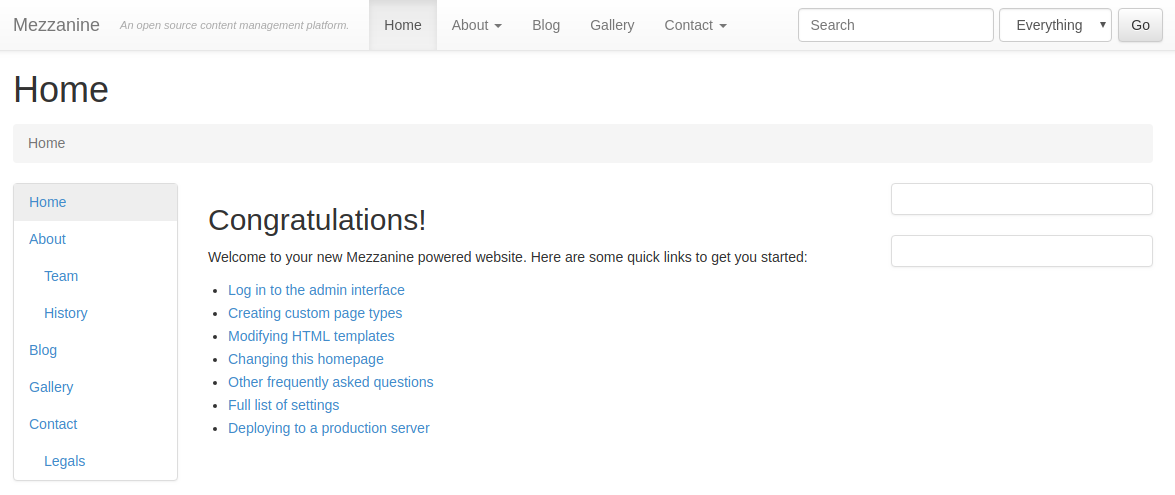
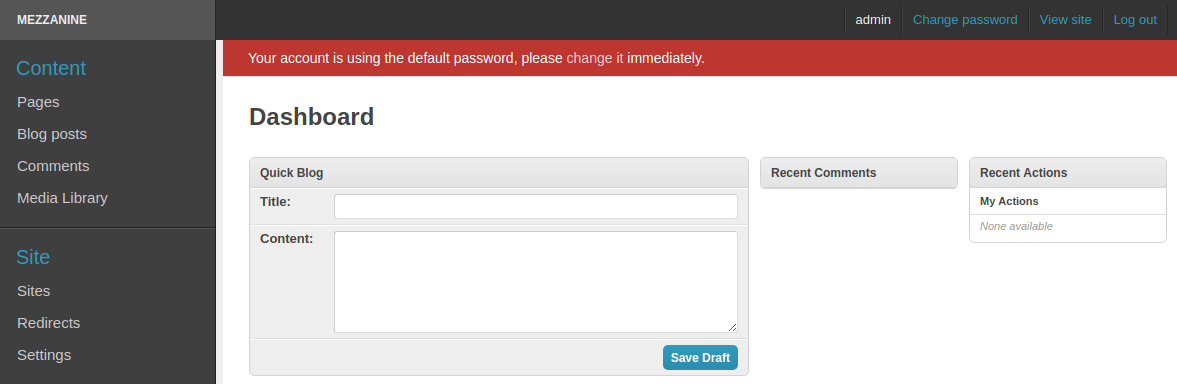
Start working with your Mezzanine CMS application (the default credentials for the admin panel are - admin/default).
Mezzanine CMS Manual Deployment
The process of the Mezzanine CMS deployment can be divided into three steps: installation, database configuration, and starting.
Install Mezzanine CMS
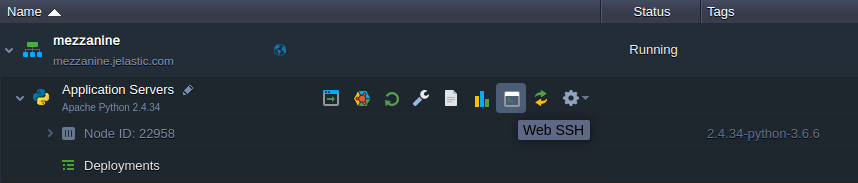
1. Connect to your application server via Web SSH:
2. It is a common practice to run Python web applications in the isolated virtual environments, using the virtual environment tool, which allows managing projects’ dependencies independently and without the administrator privileges.
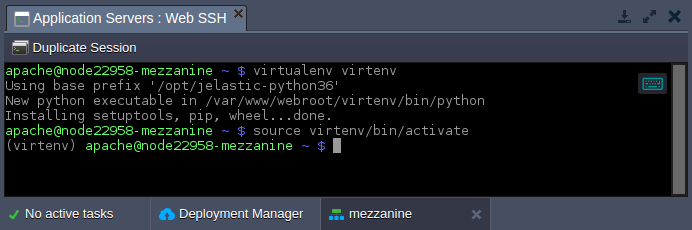
Create and start a new virtual environment with the next command:
virtualenv virtenv
source virtenv/bin/activate
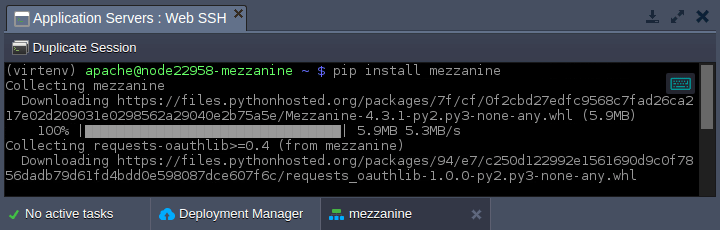
3. Use the pip package manager to download Mezzanine content manager:
pip install mezzanine
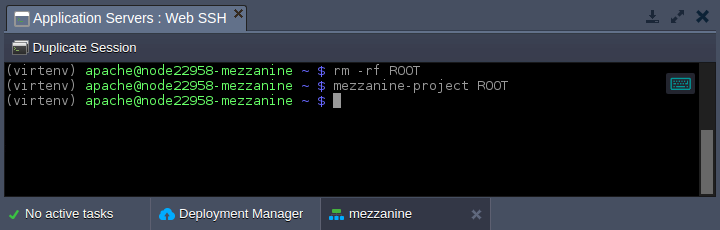
4. Let’s remove the default application in the ROOT context and install the Mezzanine project instead:
rm -rf ROOT
mezzanine-project ROOT
Now, you need to configure a database for the application.
Configure Database
You have two main options when selecting a database for Mezzanine CMS:
- SQLite is a default solution, which is implemented by default and does not require any additional configurations (data will be stored locally in ~/ROOT/db.sqlite3); it is suitable for the development and testing purposes
- external SQL database (e.g. MySQL or PostgreSQL) is much more a more secure option, which provides greater scalability; it is recommended for the production environment
If the first option is sufficient for you, skip this section and proceed to the Run Mezzanine CMS one. As for the usage of the external database, you can find a detailed step-by-step guide on the required adjustments in the steps below:
1. Create the desired database instance. For example, we’ll add the MySQL server to the separate environment.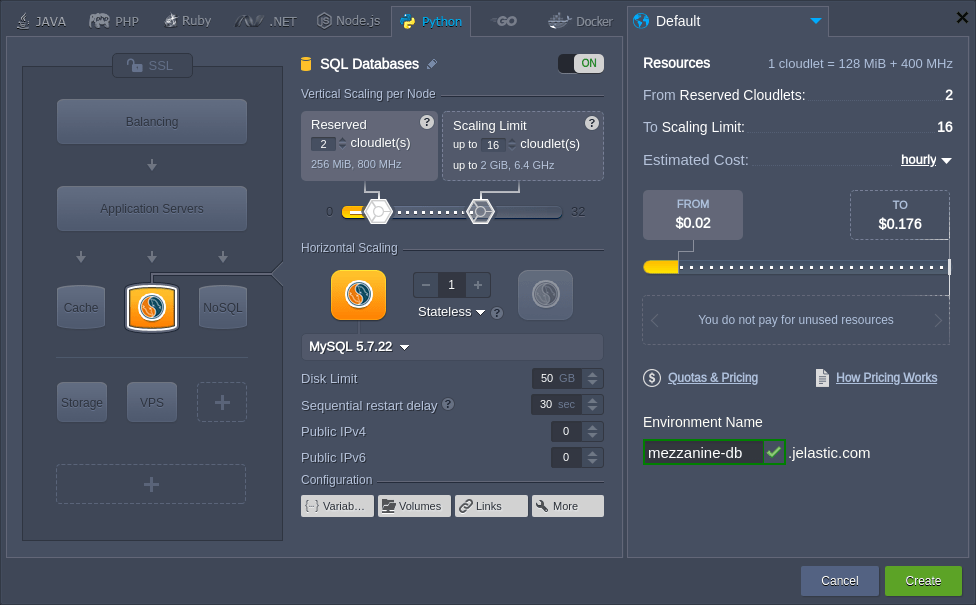
2. Log into your database admin panel with credentials from the appropriate email (automatically sent after DB node creation).
3. Switch to the User accounts tab and click the Add user account link to create a new account, which will be used by the Mezzanine CMS application to access a database.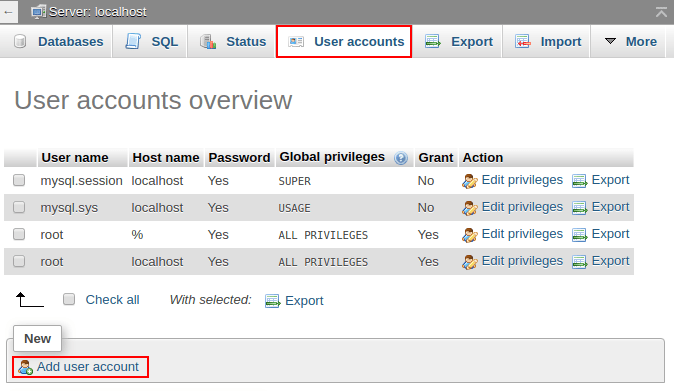
4. Within the opened page, specify the preferable User name/Password and tick the Create database with same name and grant all privileges checkbox.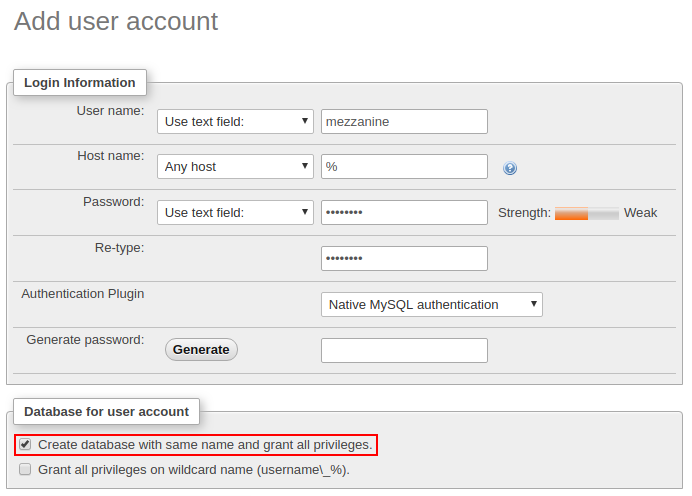
Scroll down and click Go.
5. Return to the dashboard and open the /var/www/webroot/ROOT/ROOT/local_settings.py file. Find the DATABASES section and provide your DB access credentials:
DATABASES = { "default": { "ENGINE": "django.db.backends.mysql", "NAME": "mezzanine", "USER": "mezzanine", "PASSWORD": "passw0rd", "HOST": "node23132-mezzanine-db.jelastic.com", "PORT": "3306", } }Here:
- ENGINE - change to the database type to django.db.backends.mysql (or the django.db.backends.postgresql_psycopg2 one for the PostgreSQL database)
- NAME, USER, PASSWORD - provide the data on the dedicated DB and account (the ones created in the previous step)
- HOST - get the value from the appropriate email
- PORT - set the default 3306 port (or 5432 for PostgreSQL)
Save changes.
6. Lastly, you need to install MySQL connector for Python. Run the next command via Web SSH:
pip install mysqlclient

PATH=$PATH:/usr/pgsql-9.6/bin/ pip install psycopg2
If needed, modify the pgsql-9.6 part according to the used version of the PostgreSQL server.
Start Mezzanine CMS
After your DB is prepared, you need to create the application database schema.
1. Enter the ~/ROOT folder and run the manage.py script.
cd ROOT
python manage.py createdb --noinput
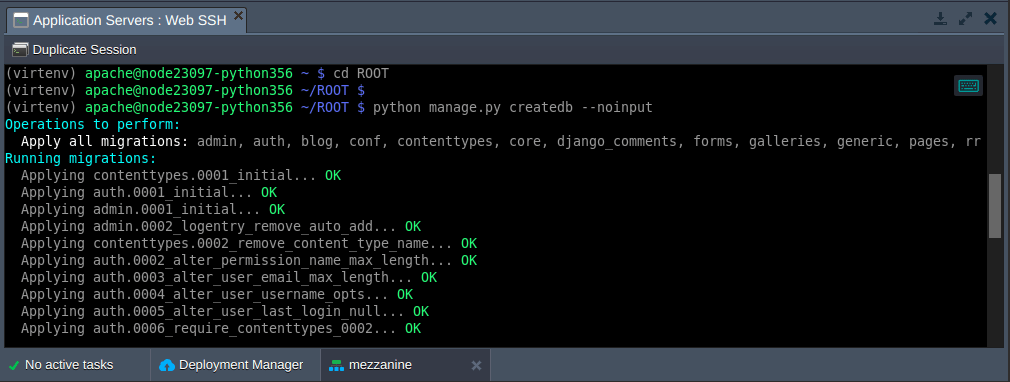
The usage of the --noinput parameter, automatically creates a Mezzanine admin account with the admin/default credentials.
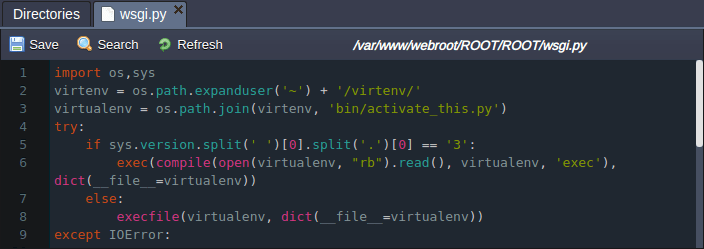
2. The mod_wsgi is used to run the application, so adjust the appropriate /var/www/webroot/ROOT/ROOT/wsgi.py file as follows:
import os,sys
virtenv = os.path.expanduser('~') + '/virtenv/'
virtualenv = os.path.join(virtenv, 'bin/activate_this.py')
try:
 if sys.version.split(' ')[0].split('.')[0] == '3':
  exec(compile(open(virtualenv, "rb").read(), virtualenv, 'exec'), dict(__file__=virtualenv))
 else:
  execfile(virtualenv, dict(__file__=virtualenv))
except IOError:
 pass
sys.path.append(os.path.expanduser('~'))
sys.path.append(os.path.expanduser('~') + '/ROOT/')
sys.path.append(os.path.expanduser('~') + '/ROOT/ROOT/')
os.environ['DJANGO_SETTINGS_MODULE'] = 'ROOT.settings'
from django.core.wsgi import get_wsgi_application
from mezzanine.utils.conf import real_project_name
application = get_wsgi_application()
Don’t forget to Save changes.
3. Configure symlink to the file and, also, collect a static content with the following commands (run from the ~/ROOT folder):
ln -sfT ~/ROOT/ROOT/wsgi.py ~/ROOT/wsgi.py
python manage.py collectstatic

Now, application static content is stored in the ~/ROOT/static directory.
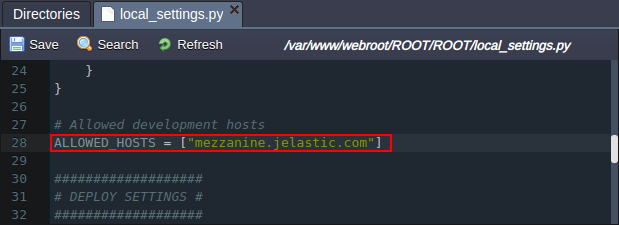
4. Open the /var/www/webroot/ROOT/ROOT/local_settings.py file and adjust the ALLOWED_HOSTS record by providing your environment domain name:
ALLOWED_HOSTS = ["{envDomain}"]
5. That’s it! Click the Open in Browser button next to your environment to access Mezzanine CMS.
6. Application’s welcome page will be opened by default.
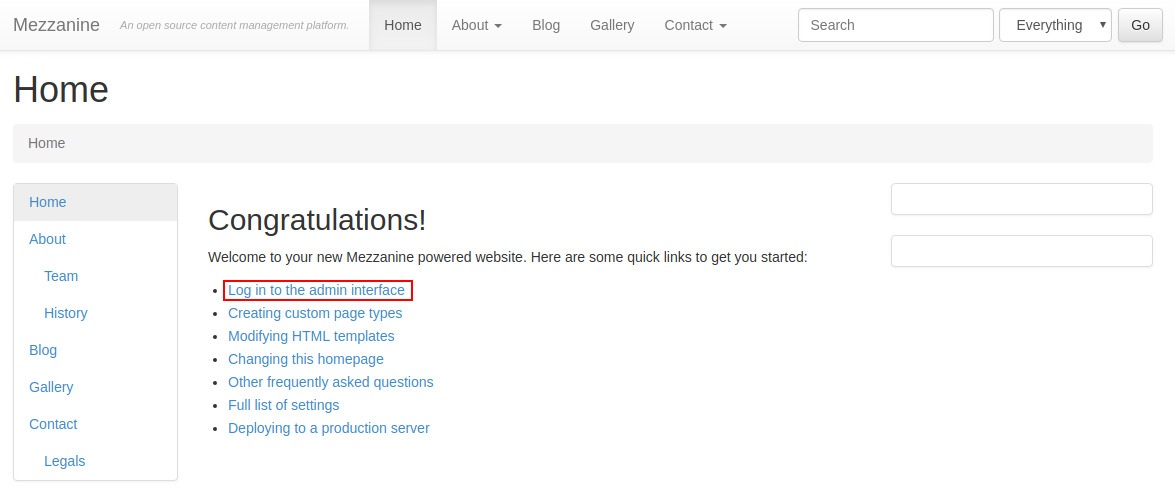
Follow the Log in to the admin interface hyperlink to access the admin panel.
7. Log in with the default admin account credentials (i.e. admin/default).