PostgreSQL Database Replication
Replication is a fundamental technology for any database server because downtime or data loss can result in reduced accessibility, productivity, and product confidence. Using data replication from a primary to one or more standby servers decreases the possibility of any data loss. With PostgreSQL, you can easily create a database cluster of Primary-Secondary (formerly known as master-slave replication) topology with one or more standby servers.
Using WAL (Write-Ahead Logging) data is the fastest available way of replication with a great performance, so-called asynchronous replication. In this case, the primary database server works in archiving mode, just writing the WAL files to the storage and propagating them to the standby database server that operates in recovery mode. These files are transferred to the standby database promptly after writing is completed.
So, let’s see how the Primary-Secondary PostgreSQL database cluster can be installed and configured.
Creating PostgreSQL Primary-Secondary Cluster
The platform provides two automated ways to get a PostgreSQL cluster:
Pre-Packaged Marketplace Solution
The quickest and most straightforward way to create a PostgreSQL cluster is to use the pre-packaged solution from the marketplace.
1. Click the Marketplace button at the top-left of the dashboard and search for the PostgreSQL Primary-Secondary Cluster package.
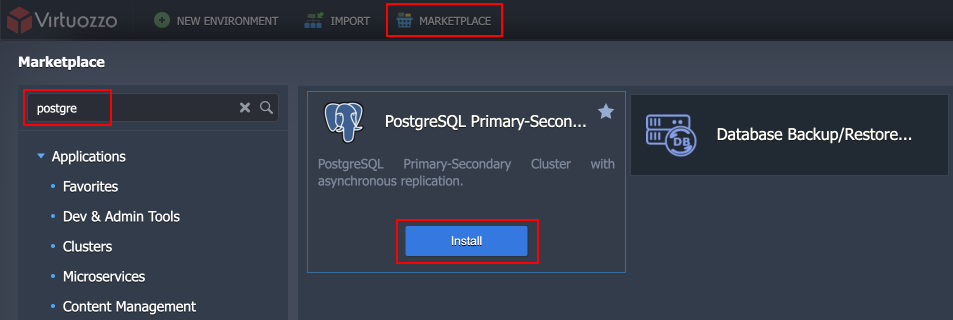
Hover over the solution and click Install to proceed.
2. Within the opened dialog, you can select the preferred PostgreSQL version and enable Pgpool-II load balancers.
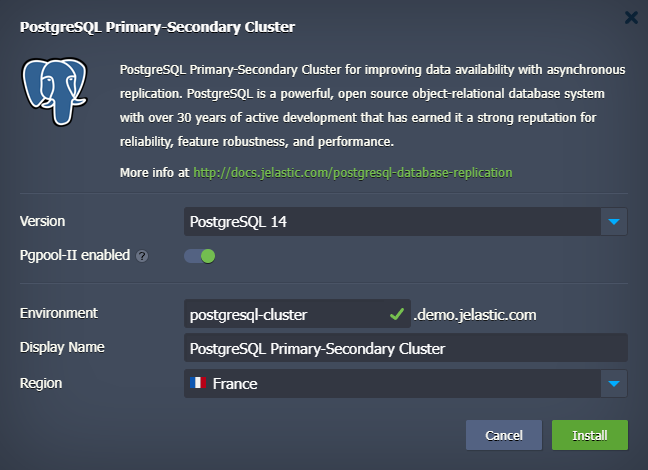
3. Wait a few minutes for the platform to prepare your environment and set up the required replication configurations.
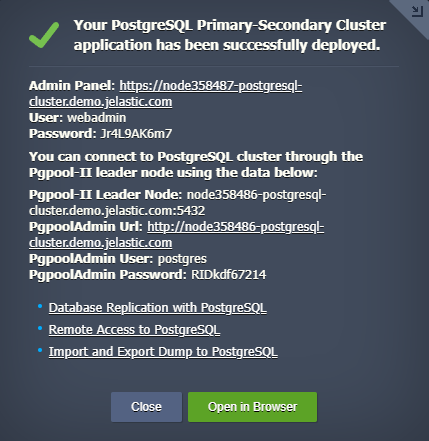
When finished, you’ll be shown the appropriate notification with data for PostgreSQL administration interface access (also sent via email).
Topology Wizard Auto-Clustering
PostgreSQL database cluster can be enabled via the embedded Auto-Clustering feature at the dashboard. It provides more customization options compared to the marketplace option while still automating all the configuration processes.
1. Open a new environment topology wizard, pick the PostgreSQL database software stack and just turn on a dedicated Auto-Clustering switch. If needed, you can enable Pgpool-II load balancer for your cluster.
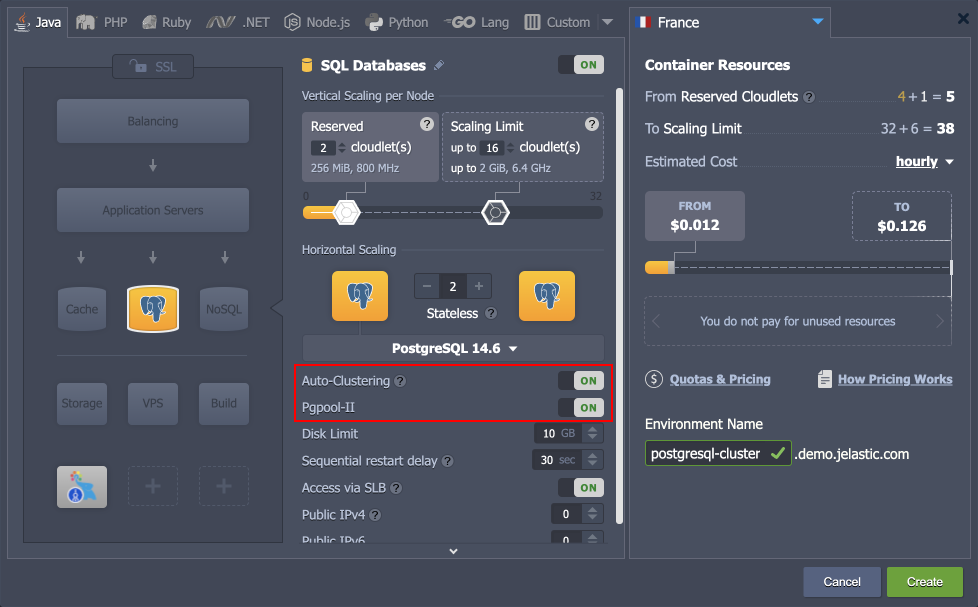
Next, you can fully utilize the customization power of the wizard to change the number of nodes per layer, allocate additional resources, add other software stacks to your environment, etc.
2. When ready, click Create and wait a few minutes for the platform to create your environment.

Managing PostgreSQL Cluster
Below, we’ll provide some helpful information on PostgreSQL cluster management:
- Cluster Entry Point
- Cluster Admin Panels
- Primary PostgreSQL Configuration
- Configuring Standby
- Replication Check
- Automatic Failover Scenario
- Manual Failover Scenario
Cluster Entry Point
If Pgpool-II nodes were not added to the cluster topology, use the Primary node to access the cluster. If the load balancing layer was deployed in front of the database cluster, you could use any of the Pgpool-II nodes as the entry point.
Cluster Admin Panels
In PaaS, the PostgreSQL cluster components can be managed either via CLI or UI.
- Database Management
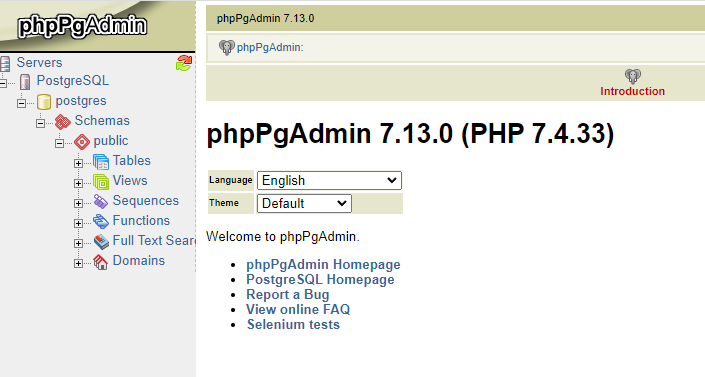
Database nodes have a built-in management administration panel phpPgAdmin. Use the only one on Primary node.
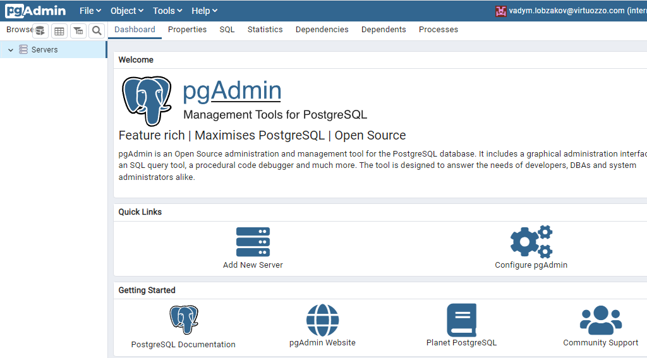
If required, the separate node can be installed with more advanced PostgreSQL database management software pgAdmin4 via importing the following manifest.
- Pgpool-II Management
Pgpool-II nodes can be also managed via user-friendly built-in Administration Panel pgpoolAdmin.
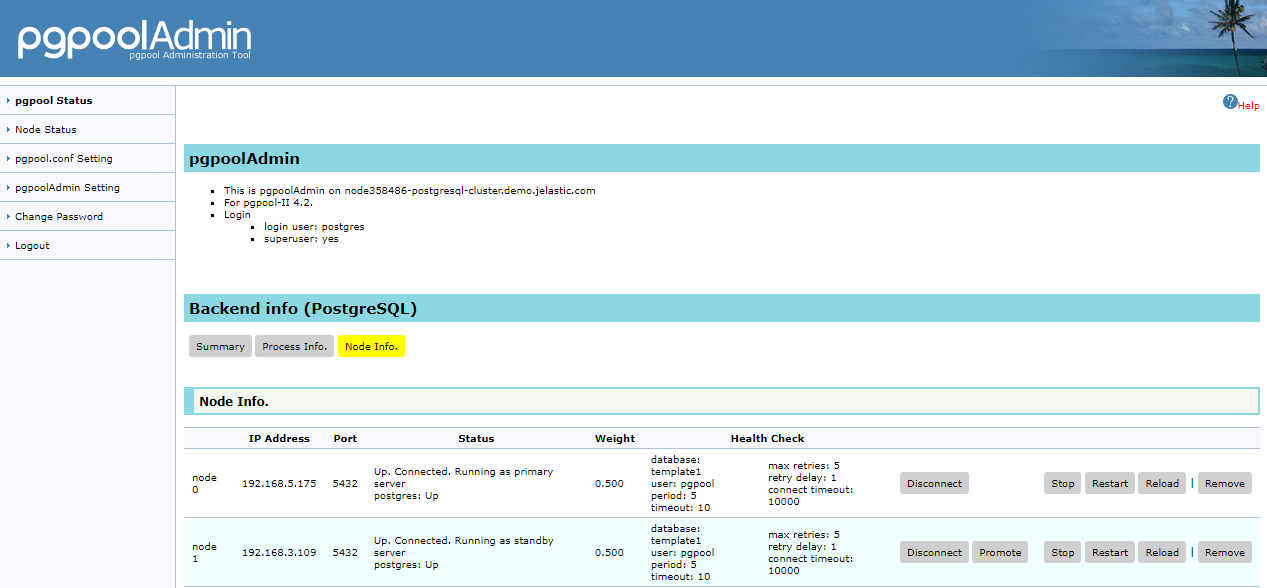
Pgpool-II admin panel provides an ability to tune:
- load balancing and distribution at database level (how the requests to every database should be processed and balanced)
- connection pools
- logging
- replication
- debugging
- failover and failback
Primary PostgreSQL Configuration
Let’s take a look at the primary node configuration parameters used in auto-clustering.
1. Find the environment with the primary database in your environments list. Click the Config button next to the PostgreSQL Primary node.

2. Open the conf directory and navigate to the postgresql.conf file.
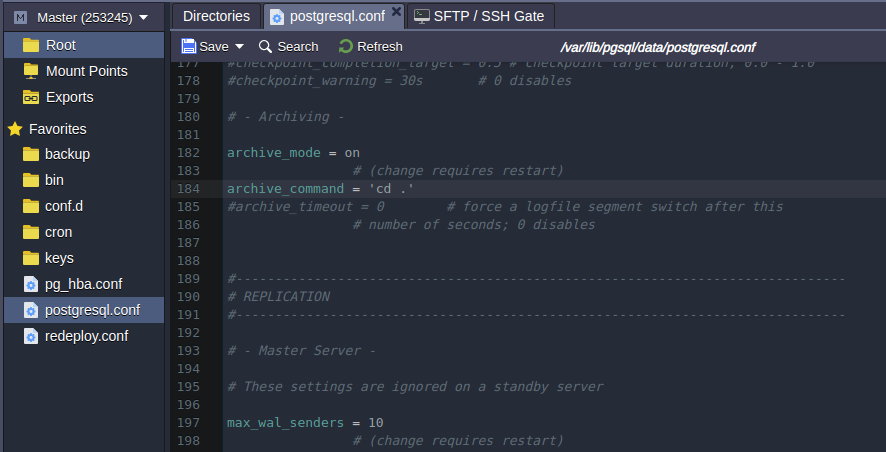
The following lines related to the WAL files can be changed if necessary:
| |
Where:
- The wal_level parameter determines how much information is written to the WAL. There are three possible values:
- minimal - leaves only the information needed to recover from a failure or emergency shutdown.
- replica - default value, which writes enough data to support WAL archiving and replication, including running read-only queries on the standby server. In releases prior to 9.6, the archive and hot_standby values were allowed for this parameter. In later releases they are acceptable but mapped to the replica.
- logical - value adds the information required to support logical decoding to the replica logging level.
- max_wal_senders sets the maximum number of simultaneously running WAL transfer processes.
- archive_mode allows WAL archiving along with wal_level parameter (all values enable archiving except for minimal value).
- archive_command - the local shell command that will be executed to archive the completed WAL segment. By default it does nothing by executing ‘cd .' that means the archiving actually disabled. You may try to change it as follows to copy WAL archives to the destination directory you prefer (e.g /tmp/mydata):
| |
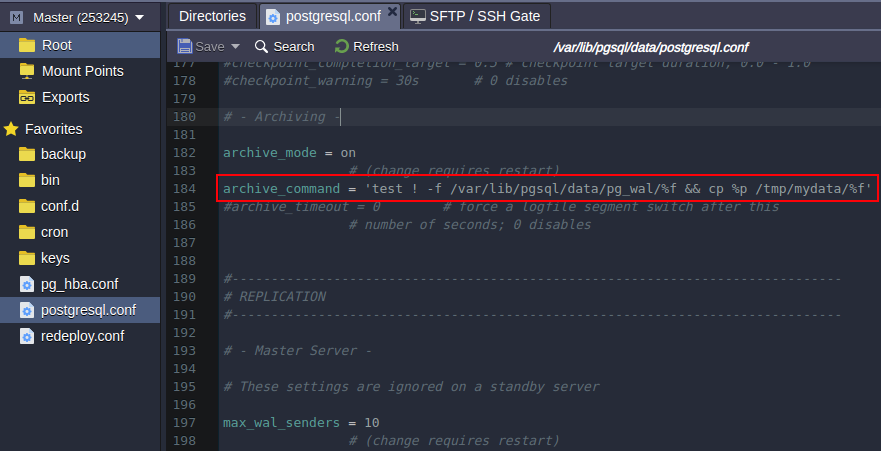
Press the Save button above the editor.
3. Open the pg_hba.conf configuration file. The standby database connection is permitted by stating the following parameters:
| |
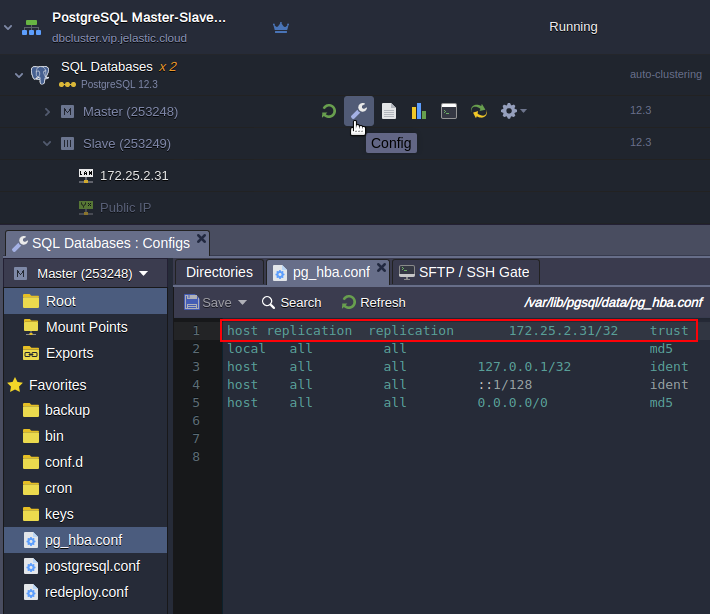
That’s all for primary! Let’s proceed to the standby server’s configuration.
Configuring Standby
Let’s inspect configuration files at the Secondary node. There are only three options that distinguish secondary from primary:
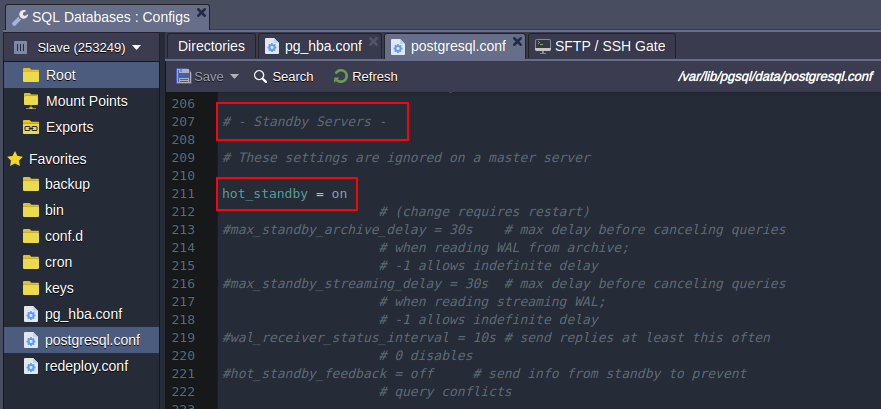
1. Open the postgresql.conf file, find the Standby Servers section. As you can see this server is acting as standby since the hot_standby parameter is on unlike the primary node where this parameter is commented out.
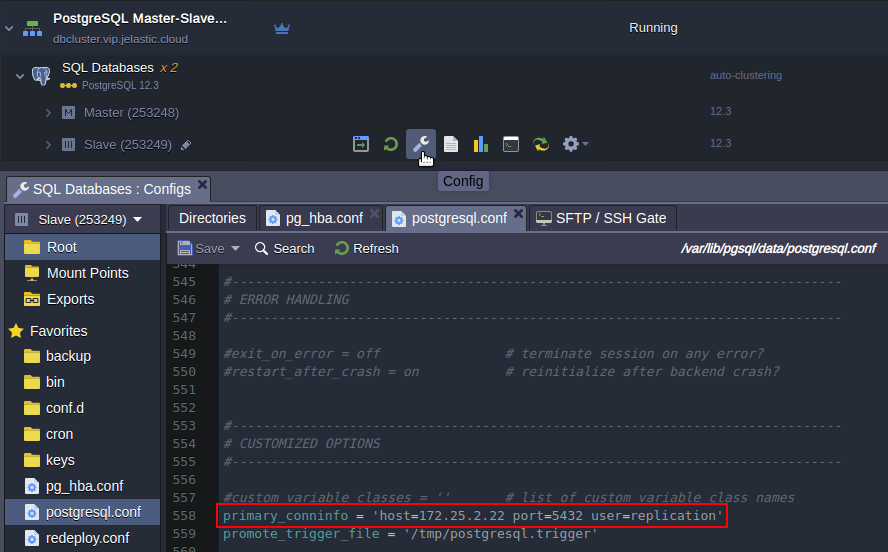
2. Scroll down to the end of the config file. There is a primary_conninfo parameter that specifies the connection string which the standby server will use to connect to the sending server. The connection string must indicate the host name (or address) of the sending server, as well as the port number. The username corresponding to the role with the appropriate privileges on the sending server is also provided. The password must also be specified in the primary_conninfo or in a separate ~/.pgpass file on the backup server if the sender requires password authentication.
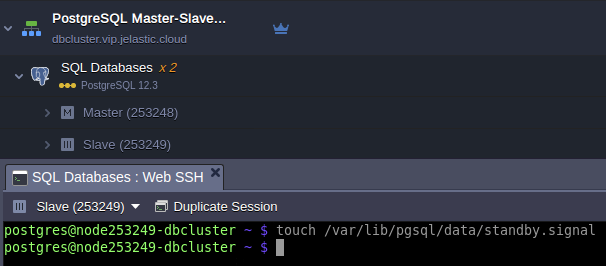
3. The last option that makes database server as secondary is standby.signal file availability, which indicates the server should start up as a hot standby. File must be located in the PostgreSQL data directory and it can be empty or contain any information. Once a secondary is promoted to primary this file will be deleted.
Note: Keep in mind that most of the options that are being changed require the server should be restarted. It can be done it in two ways:
1. From the dashboard you can restart either one or both nodes.

2. Through a command line interface via Web SSH client. To do this click on the Web SSH button at the required node, e.g. secondary.
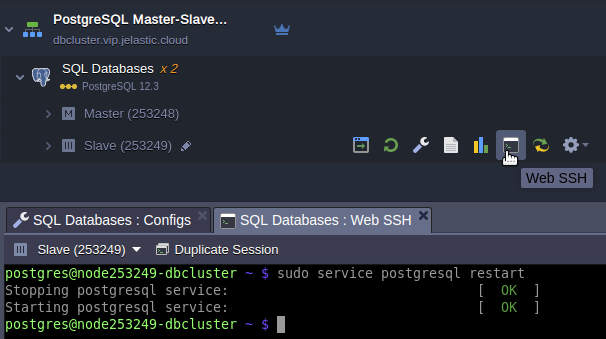
And issue a command to restart database server:
| |
Replication Check
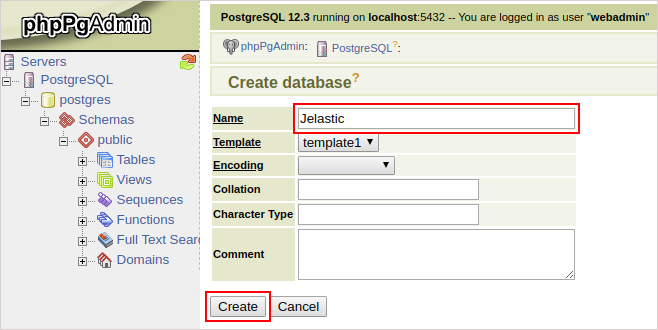
1. Open the phpPgAdmin panel for your primary database by clicking Open in Browser button next to it.

2. Log in with the database credentials you’ve got via email earlier and create a new database.
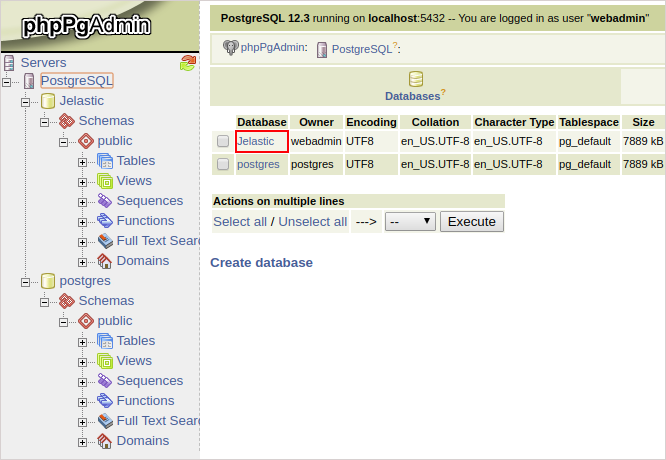
3. Then you should open the admin panel of your standby database server (in the same way as for primary one) and check whether the new database was replicated successfully or not.
Automatic Failover Scenario
The automatic failover for the PostgreSQL cluster is implemented with the help of the Pgpool-II node and is not available for the topologies without it (manual configuration is required). The load balancing node automatically detects if the primary database is down and promotes one of the available secondaries. Once the problematic node is back, it will be automatically re-added to the cluster (as secondary) with all the missing data restored using the pgrewind utility.
Manual Failover Scenario
PostgreSQL has no native automatic failover scenario for database cluster. On the other hand since there are many third-party solutions that you can use to implement to ensure high-availability for your system. At the same time you may create your own solution to overcome failures of your database cluster. The multiple situations of cluster failure are possible in real life. Here we consider only one most common workflow that can help you to automate failover scenario.
The default topology comprises two nodes:
Once the primary node fails the secondary node must be promoted to a new primary. It can be done with the utility pg_ctl which is used to initialize, start, stop, or control a PostgreSQL server. To do this log in to the standby server via Web SSH and issue command as follows:
| |
where /var/lib/pgsql/data is a database data directory.

Once the secondary database is promoted to the primary, you should change your application connection string in order to change database cluster entry point to a new hostname or IP address.
Failover process can rely on pg_isready utility that issues a connection check to a PostgreSQL database.
You may create a simple script which checks primary database server availability and promotes the standby in case of primary failure. Run the script through a crontab at the secondary node with an appropriate interval. The script may look like below. Let’s call it as failover.sh:
| |
Once script is triggered the secondary promotion to primary, the script output should look like:
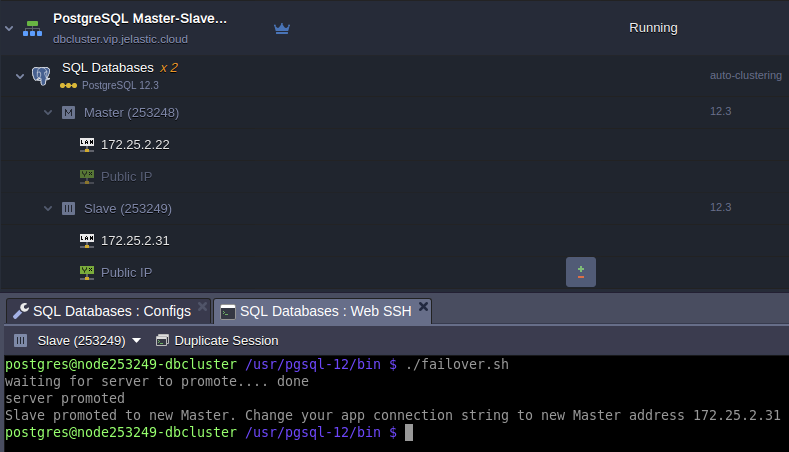
Now your database got back to work and ready to handle read/write requests by the new primary address.
Cluster Restoration
With a new primary address you can easily avoid tuning your application connection string changing IP addresses of the primary database. To do this you have to put a load balancer in front of the cluster that will monitor the status of its components and route traffic to the current primary. Below, we will demonstrate how to restore original cluster topology and thus no changes will be required at the frontend.
Another reason the topology should be restored is related to ensuring a scaling ability of the cluster. Only original topology can be scaled in/out horizontally.
Let’s see how to perform PostgreSQL database cluster restoration after the former primary was dropped off from the cluster and the former secondary was promoted to the primary.
So, the task is: the dropped-off primary should become the actual primary and the current primary (former secondary) should become the actual secondary.
The initial data are:
- Database cluster comprises two nodes primary (IP: 172.25.2.22) and secondary (IP: 172.25.2.31).
- Primary node went down and the primary database was stopped.
- Standby database was promoted to the primary role.
- Now the secondary retains the reads/writes.
- Former primary node was fixed out and is ready to be reintroduced to the replication as primary.
Do the steps as follows to get the cluster of initial topology:
1. Enter former primary node via Web SSH and issue command:
| |
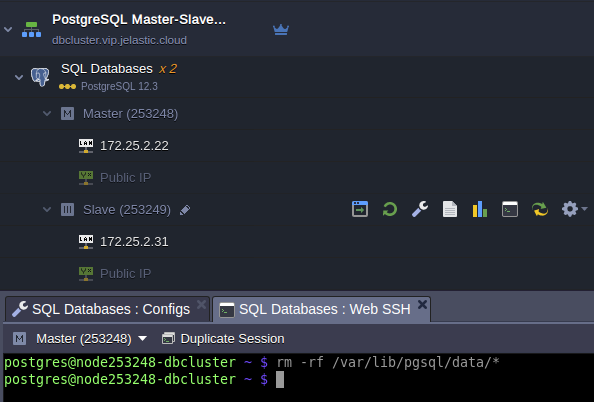
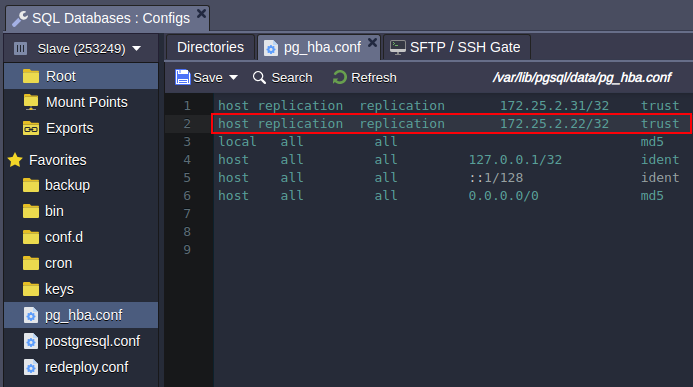
2. Add former primary IP address 172.22.2.22 to pg_hba.conf at the current primary node:
| |
Restart current primary database to apply the changes:
| |
3. Enter the former primary node via Web SSH and issue command:
| |

Where:
- pg_basebackup - is used to take base backups of a running PostgreSQL database cluster.
- 172.25.2.31 - IP address of the current primary node.
- /var/lib/pgsql/data - PostgreSQL data directory.
4. Make sure the IP address in the host parameter described in thesecond step of Configuring Standby contains proper IP address of the former primary.
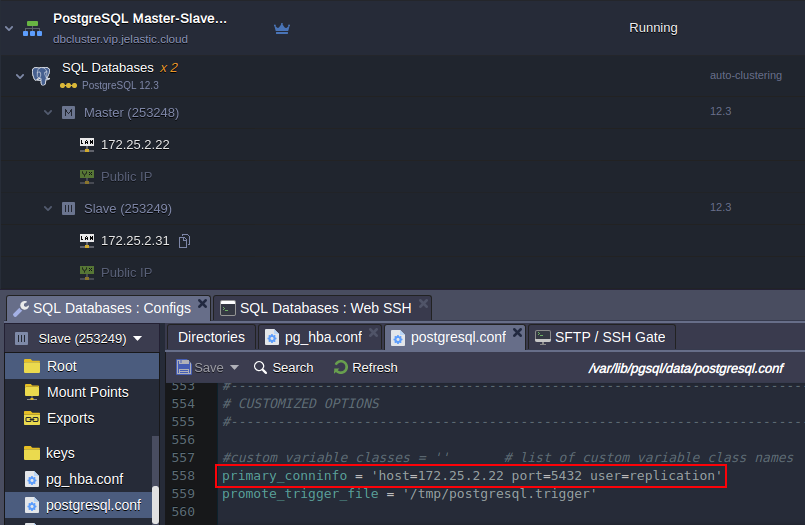
5. Create standby.signal file at the current primary:
| |
And restart the node to get new secondary database:
| |
Remove the standby.signal file at the former primary:
| |
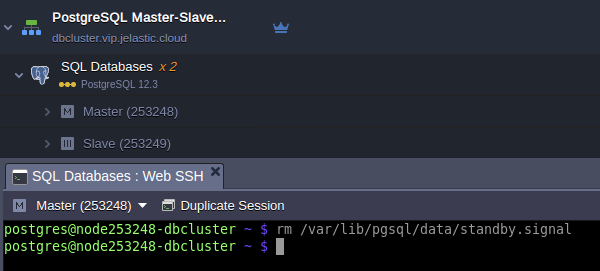
And restart the node to get new primary database:
| |
6. Finally, in order to reach a consistent recovery state for both primary and standby databases the final restart is required that can be done via dashboard as follows:
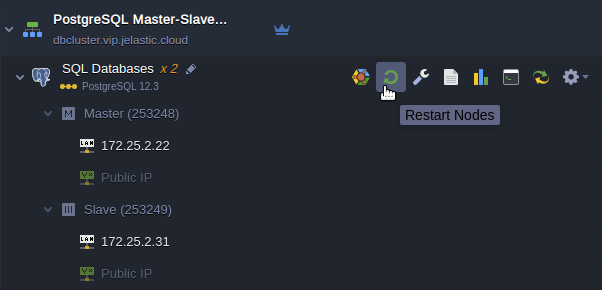
Once the restart process is completed the cluster comes back to original topology and may be scaled horizontally.